When I built my current computer around May 30, 2008, I decided to note down the experience so I could remember what it was like and so I could share it with other people. Read on for more details…
This is a reprint of a computer construction event that I posted at a clan forum at May 30, 2008.
Read this first!!
The following details my construction of my new computer. The post is quite long but worth the read. Also you can thank Oglie2000 for taking all the pictures. Other people to thank is at the bottom of this post.
Note that I digitally edited these photos only to resize them, edit out my face (I’m shy!), and fix lighting issues on two or so photos. Otherwise, they are as they were taken.
This post is quite long. If there are any errors or anything you want to know about, PLEASE LET ME KNOW. I certainly cannot proofread this easily.
Also note that I am not a “one man tech desk” and I don’t want overwhelmed with technical support requests. I built my new system after about a month of research and asking around in relation to what parts to buy.
Finally, building a system is a highly technical thing to do. If you are not a computer expert then you will easily save yourself a TON of trouble if you buy a computer. However, if you are technical savvy, you want to try something new, you want to call the computer “your own”, and you don’t mind wasting some money… then building a computer might be right for you.
With that said, let me tell you a story about my new computer…
Introduction
Recently (a week ago) I built a new computer. This was a system build to completely replace my old computer. Simply put, my old system was not up to specifications to play Steam games nor to play Battlefield 2. It was built in Fall 2002 and has served until now (May 2008). It has certainly been a long time running for that computer.
Old Computer specifications are here…
- Windows XP (now SP 3)
- AMD Athlon XP 1800+ (with a potential overclock to 2400+)
- 1 Gb memory (2 x 512 Mb)
- Asus A7N8X Deluxe motherboard
- ATI Radeon 9600 video card
- Cheapo case
- 500 Gb total hard drive space (4 PATA Hard Drives, two on a Raid card)
- One DVD Rom drive, One DVD burner drive
- Floppy drive
- Fan controller, 3 loud fans, 1 kinda loud fan, and 1 kinda quiet fan
- Blue cold cathode
I needed to build a system. Finally, after some talking on Teamspeak and various discussions at OC Forums and alike, I decided on these parts.
New Computer Specifications are here…
- Windows Vista Business
- Intel Core 2 Duo E7200 Wolfdale 2.53GHz 3MB L2
- Mushkin 2GB (2 x 1GB) 240-Pin DDR2 SDRAM DDR2 800 (PC2 6400)
- GIGABYTE GA-EP35-DS3L LGA 775 Intel P35 ATX Intel Motherboard – Retail
- GIGABYTE GV-NX96T512H-B GeForce 9600GT 512MB
- COOLER MASTER CAC-T05-WW Centurion 5 Mid Tower Case (Silver) Retail
- Seagate Barracuda 7200.10 ST3500630AS 500GB Serial ATA 7200RPM Hard Drive w/16MB Buffer
- SAMSUNG Black 1.44MB 3.5″ Internal Floppy Drive
- SAMSUNG Black 2MB Cache SATA 20X DVD±R DVD Burner with LightScribe – OEM
- Scythe SY1225SL12M 120mm “Slipstream” Case Fan – Retail
- ENERMAX UC-8EB 80mm Case Fan – Retail
- Scythe SCKTN-2000 100mm Sleeve “Katana 2” CPU Cooler – Retail
- UV/Blue Cold Cathode
The power supply I purchased was an OCZ 500 watt to replace the OCZ 700 watt in my old computer. However, this didn’t quite work as well as I hoped (more on that later).
The build started and finished last Friday (the 23rd) up to and completely through Halo training (oops).
The Parts
The part list was already detailed above. However, as you can imagine from the title, I have pictures!!
All the parts on the left have to find their way coherently into the case on the right. Note the OCZ power supply in this picture was destined for the old computer. Also in the left of this picture is the tools I used.
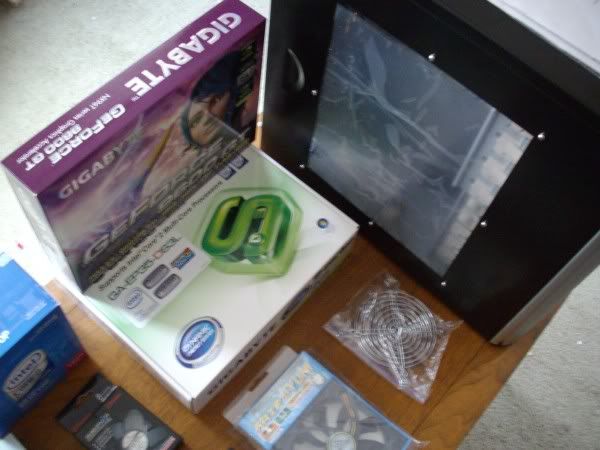
Note that the fan guards in this picture were never used however can be at any time. The motherboard is the GA-EP35-DS3L/S3L and is a revision 1.0 board. This board showed up days before I purchased it which completely discontinued the board I was considering. However, this new board has some fancy features…
The board advertises that along with the solid state capacitors that it additionally can save power when you use the bundled power saving software. Mainly, the board can turn off different power “phases” which power the CPU when the CPU isn’t doing as much. This can save on power bills. For now though, I haven’t used that feature too much, but it is nice to have the option. Also, the board fully supports the 45 nm processor I purchased as opposed to needing a Bios update out of the box.
Yes, the video card is made by the same manufacturer. I found that kinda nifty. 😀
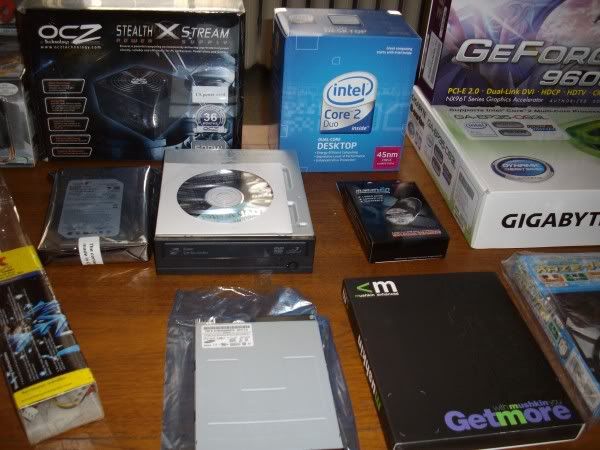
You can see the processor right in the back center. The power supply box looks surprisingly familiar to the one that the other power supply came in. So, I suppose that box can stand in for what the other power supply’s box would look like. The memory came in a larger box because it came with some 3dMark software as well. Also, even though it is slightly out of the picture, I DID purchase a floppy drive… I wanted it!
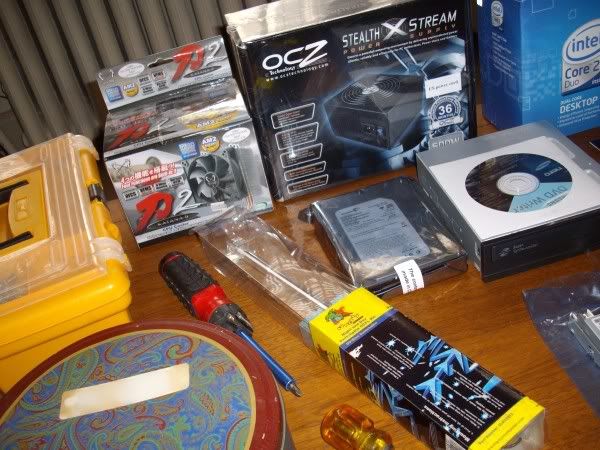
This shot shows the cold cathode and heatsink boxes. The cold cathode can show both UV and Blue lighting and the heatsink should be a step up from the default Intel heatsink. Yes, there is Chinese (or something) on the heatsink box.
There is also some details about the tools to be used. There isn’t a whole ton needed…. kinda.
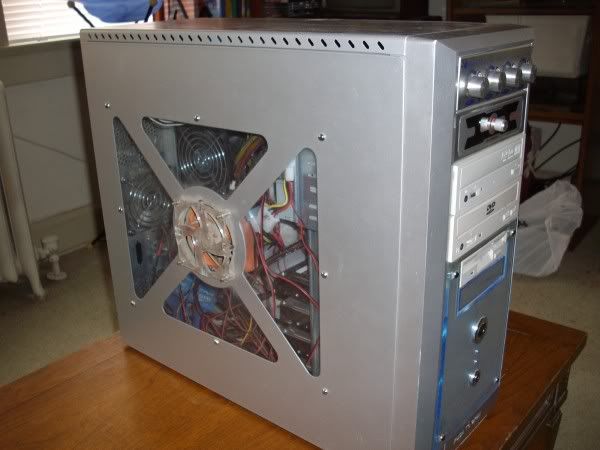
The old computer is shown above. Mainly, the side panel has a fan and a window. I found this in window fan to be a less than optimal solution. Even worse, the fan had quite a few cables that hung over the window obscuring the view and blocking air flow. Let’s focus on one key factor here… there is so many cables that I doubt airflow even works well in there!!
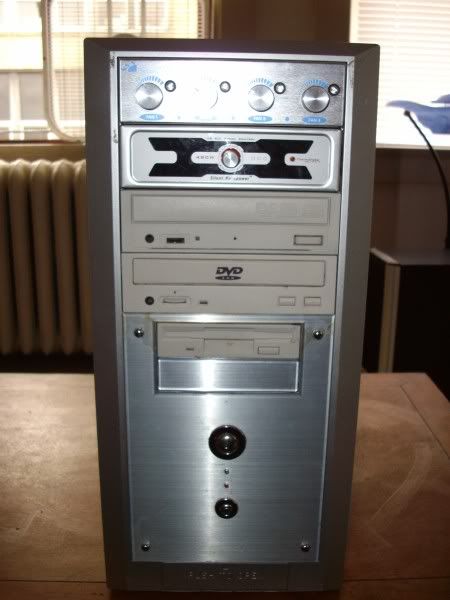
The front shows two fan controllers controlling 4 fans and 1 cold cathode. The fans are loud… REALLY loud… and I only use the fan controllers to kinda make them quieter. Even worse, the top fan controller has enough illumination to confuse pilots in winter to thinking my apartment is a landing strip! The bottom fan controller came from a long exploded power supply from Thermaltake and is able to control the side window fan. It also lists the first power supply’s wattage… 480. That computer is on its’ 3rd power supply and soon to be 4th.
The extra optical drive was an addition later on. The computer went through a few optical drives in its’ lifetime and I started to go for redundancy.
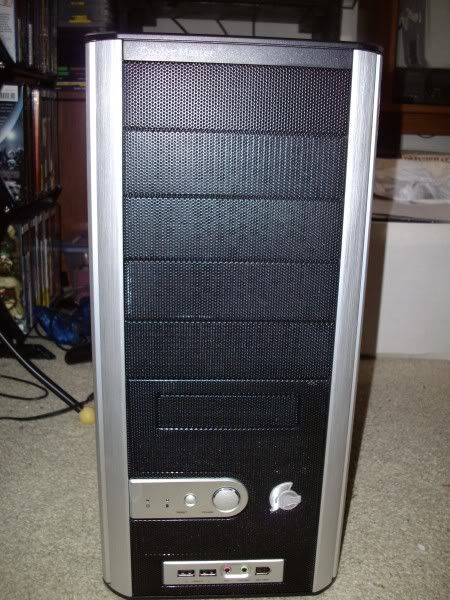
The new computer looks quite sleek on the front. There will be two black drives added (an optical and a floppy) and that is it. No hoopla with a fan controller… nothing to take away from what the case can do.
Note that the front is a perforated mesh. Air comes in from the entire front panel which is drawn in by the back fans. Additionally, this front plate is certainly not solid.
Let’s move on…
The Power Supply Replacement
In order to even start building my new system, I needed to get the power supply from the old system. That power supply was purchased with the intention of using it in a new system since it is 700 watt. The old system only needed a 500 watt power supply. That I purchased with the initial order.

Apparently, I need to dig through the mess of cables to disconnect the old power supply. Note that the fan on the side panel is still attached in various ways to the main system. All fans in that system were attached to fan controllers in the front which redistributed the power from the power supply in a controlled fashion to the fans.
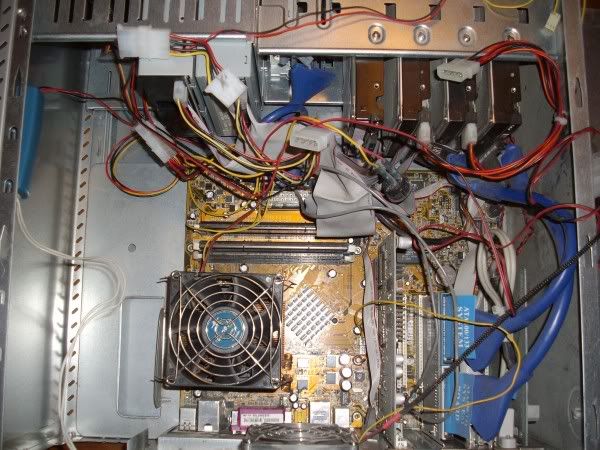
Some of the cables have been pushed aside in this shot to show the main board of the old system. Note that incremental upgrades have lead to me having 4 hard drives in that system. If you look closely you can see a switch attached to cables that can be used to turn off the cold cathode… which was needed in there to keep them on even though I had a fan controller to deal with things.
Along with the massive amount of dust, note that there are finger guards on all fans to prevent them from eating a face full of cables. Oh, that picture is without all the cabling from the power supply! The power supply has been removed for this shot. You can only imagine the mess included earlier.
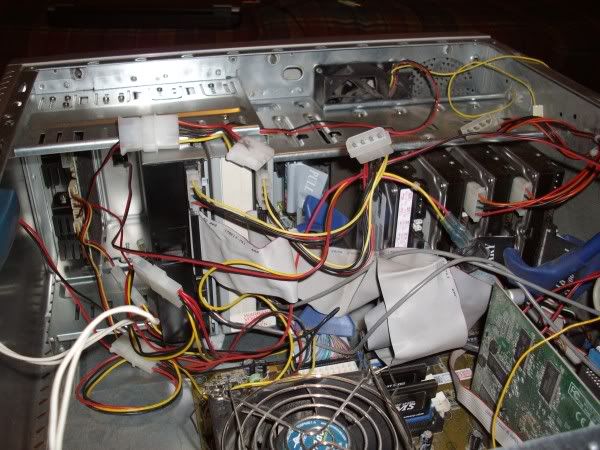
This gives an idea how much airflow was compromised from the front. The cables almost form a wall. Only one floppy drive bay was not used and the area behind the fan controllers helped store any excess power supply cables. Note that the top fan controller creates some heat from doing its’ job which only made things a tad warmer in here. Also note that any left over power cables were splitters for the old power supply.

Here is the old power supply out of the case. There isn’t much to share here other than the fact that the side power panel details were not focused on this shot. Oh well.
We got a problem here!!
I noticed at this point that the new power supply was built for new computers. In other words, I needed 10 legacy power connectors. The old power supply had six which meant I had to use a splitter or two to connect to all my devices. The new power supply has TWO. Oh, it had connectors for Sata drives and PCI-E video cards… but I couldn’t use ANY of them on the old system. There was simply no way that this could work.
The idea of taking pictures here was not in Oglie’s mind and sanity had left mine. Irregardless, with great haste and great expendature, we drove out and was able to avert disaster and find a suitable power supply at Circuit City. Yes, this new device will save the day and let me continue onwards. However… it is an Antec power supply. However, at this point I had ceased to care as long as it worked.
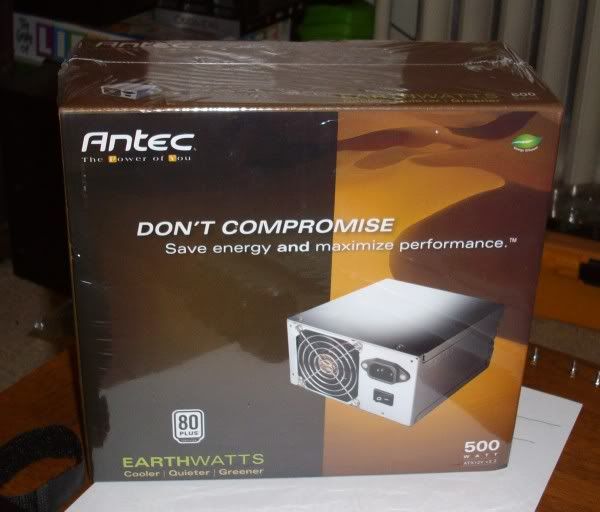
With six legacy connectors and a ton of other stuff, this power supply fit the bill. It cost a bit… but it it work nicely. Now, if this power supply blows it capacitors like the last Antec power supply I had then I will just loose more respect for that company. However, at least I can solve that issue then and still have one working computer.
My old computer started with a Thermaltake power supply that blew something (voltage regulator?). The next one was an Antec Truepower 2.0 which blew because the capacitors were cheap pieces of trash. The OCZ 700 watt power supply was next but is to be used in the new system. The above power supply shall be the 4th that this system has seen.
Reassembly was quickly done and the computer worked fine with the new power supply. I left it running at my computer desk and after calming down a bit I proceeded to start on the new system.
The New System
With the parts arranged in a sensible fashion (at least for me), I proceeded to start constructing the new system.
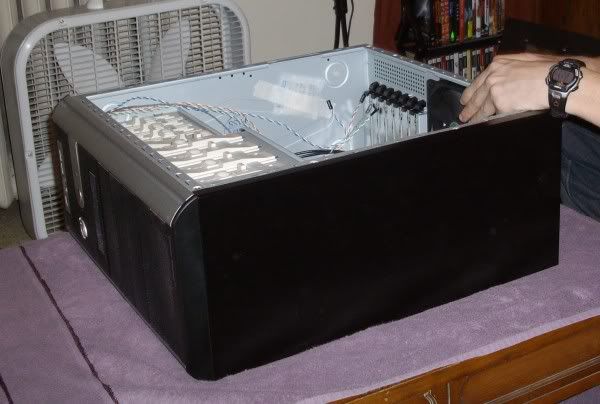
Here I am replacing the back 120 mm fan. I purchased fans with a higher CFM rating and a lower decibel sound rating. So, they are more powerful yet quieter.
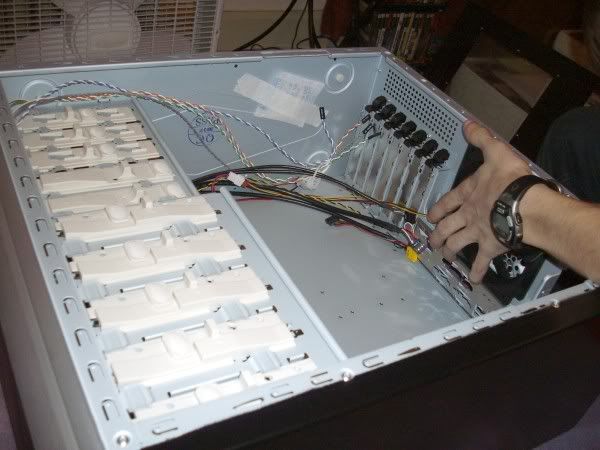
You can see pretty well that this is a rather empty case. There is still much to be done in here and the most difficult pieces are first.
Note that there are sliding rails (white) which lock or unlock drives without any tools being needed. There are also locking black clips (near by hand, top right) which secure expansion cards. We’ll see how well these work later.
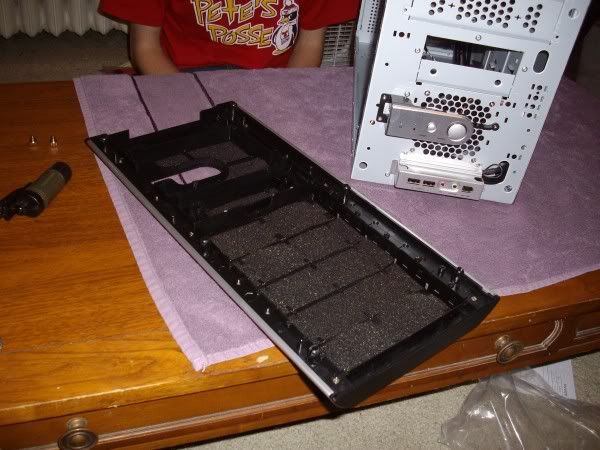
Before we move on, let’s cover the outside of the case. I had to take off the front panel to mess with the front 80 mm fan, so I figured I would cover this now.
It is recommended to have an air filter over all air intakes. This is a wonderful idea which is made all the more difficult by the fact that intake fans are very close to things like hard drives. After the pretzel like movements I had to take to get to that 80 mm fan, I could care less if it has a filter. luckily, I don’t have to worry about providing the filtering.
The entire front panel has a mesh covering build in. It will protect from dust well enough and the front panel is easy to remove as well. If I want to add a drive, I unscrew the drive plate and that part of the mesh covering goes with the plate. It is rather nifty.
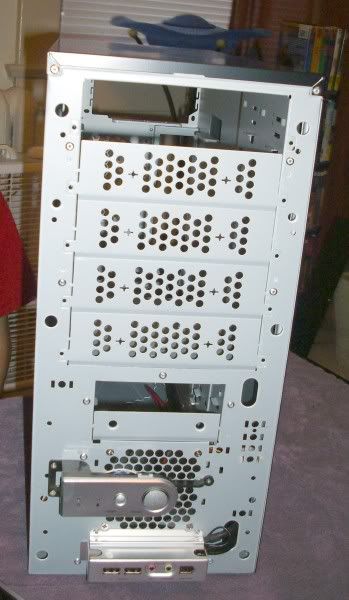
This is what is behind the plate. This is the not so pretty shell of the computer. Note that the missing optical and floppy drive pieces of the metal shell is how the case was shipped to me. That means I have little to do here. Also note that the 80 mm front fan is directly behind the power button assembly which naturally is part of the shell.
Time to move on.
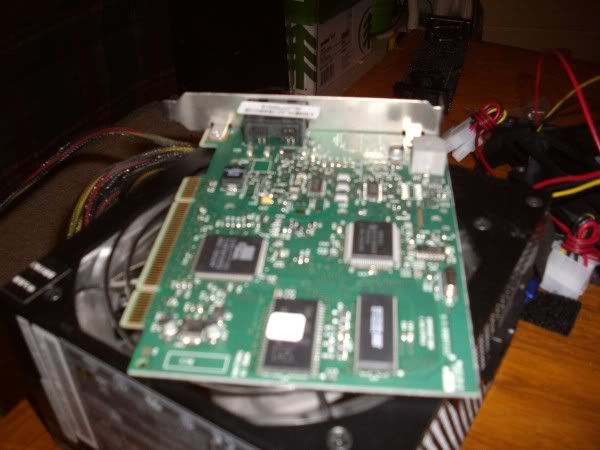
Just to note for later, this is a modem which I am sticking into the new computer. I am fond of this modem and I want it! It cost $120 about 5 years ago… so I’m not parting with it!
… yes, I am trying to avoid doing what needs to be done …
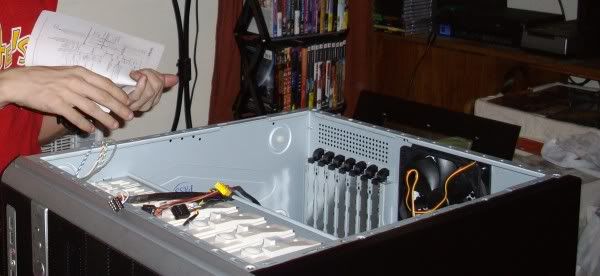
We are entering the most difficult phase of construction. Inserting the motherboard properly, inserting the CPU and then thermal greasing it, and finally putting on the heatsink happens to be something that you can easily mess up. Yes, I need directions here!!

Before inserting the motherboard, I have to replace a piece of the case. This piece is the metal part near the ports in the back. The one that comes with the case pretty much never works with any motherboards. The one that comes with the motherboard works with all cases. This was an easy thing to swap out.
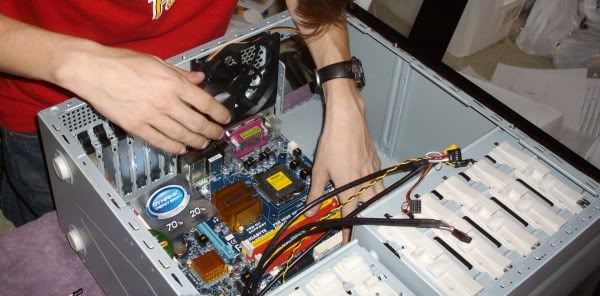
After measuring where stand-offs go (metal stub screw hole thingies) I can now insert the motherboard which I am doing in the photo above. After this step I secure the motherboard with screws and everything is done.
Note that the motherboard came with two stickers on top of the expansion card slots as seen above. I don’t know why they would do that… after all I already purchased the motherboard. Oh well.
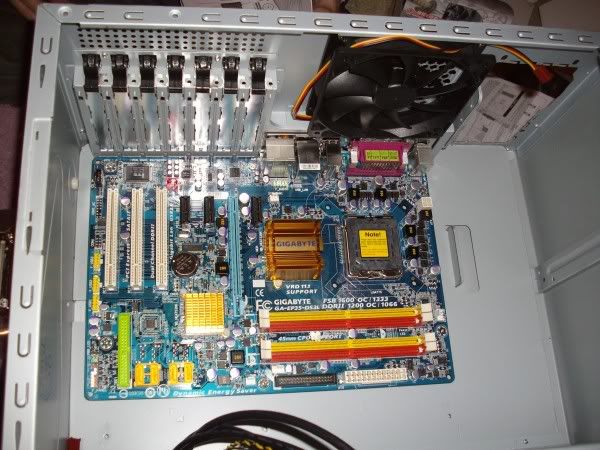
The first piece is in! It is the fundamental piece of the computer and the thing we will plug most everything else into.
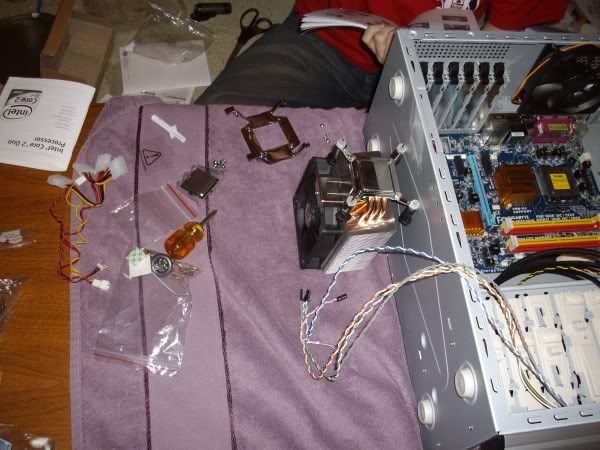
More reading directions!
The heatsink is in this shot near the case. Note that the side facing up right now should NEVER be touched by fingers. The CPU is nearby (left) and so is the thermal grease (Creamique, white tube… left and up of the CPU).
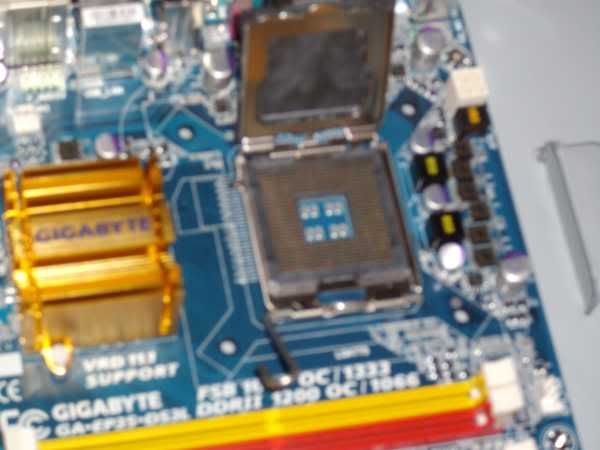
There is a load plate which swings up and you put the CPU under that. Close the load plate, put on thermal grease, put on the heatsink, and you are done. Simple.
Well, the heatsink has a great invention! You have plastic push pin clips on 4 sides. First off, two of the pins are blocked by the fan… but that can be fixed by removing the fan (not the easiest thing). So, we have 4 clips here with next to no directions to how they work.
You are supposed to turn them to unlocked, push down, and then lock. You should hear a snap. After trying this out, I was certain that by snap they meant that the motherboard would snap IN HALF. I was doing something wrong… and howling about it.
So, I start over… and do the thermal grease thing again. I finally (after great analysis) figured it out.
How to apply a Socket 775 Heatsink
- Do not have the heatsink in the case
- Turn the black part of the pin to unlock (in other words, so the white pin isn’t blocking you)
- PULL UP. The white claw part should contract
- Put in case
- Push down, NOW you will hear a click. The claw expands
- Turn the key so that it locks. If you overturn, it will unlock again and you will have to try again.
- Pull up but not with a ton of force. If things worked, the pin will not come up. If you failed, the pin and half the heatsink will come up.
Yeah… really gosh darn easy… much easier than screws… I wonder what genius thought of that… ![]()
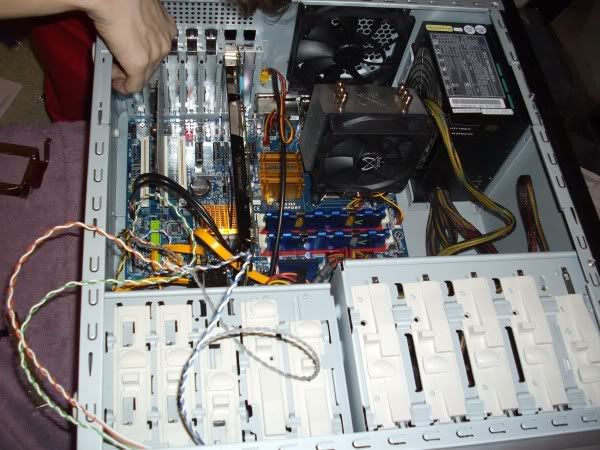
After much fuss, things did work out. All the pieces are in since they were not difficult to insert. Everything is as it should be. Also, the drives went in very well and the tools free drive securing rails work beautifully.
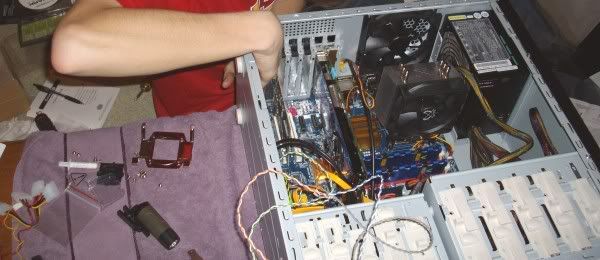
Here is a wide angle shot. As you can see, the tools used in the CPU steps really haven’t shifted position much.
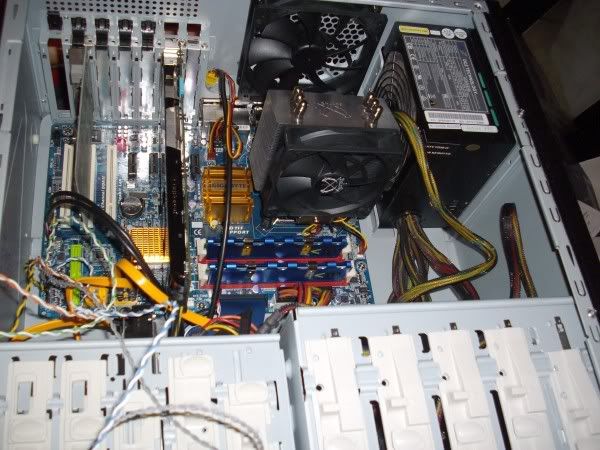
Ok, no hand in this shot. Note the black “secure the expansion cards” clips. Two of them snapped clean off when I tried to disengage them. Fortunately, the case was well equipped with replacement screws to take place of those clips. So, the clips are most certainly terrible with this case.
Also note that the video card is extremely long (closest to the heatsink). The card nearly reaches to the hard drive at the front of the case. It is also a heavy card in that it was much heavier than I thought it would be. With it needing a special power connector which looks partially similar to the motherboard power connectors, one can easily see how video cards are becoming mini computers themselves.

Yes, this case has a window which I didn’t make apparently above. I had to peal off a protective cover from both sides of the window. Talk about the static electricity though… it made things from across the planet stand on end. Fortunately it the charge has weakened somewhat… over the past week… but still remains. (I wonder how the case manufacturer pulled that one off)
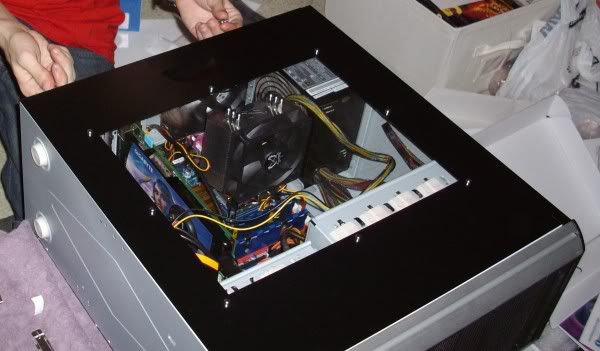
The panel is now being secured. Note that the heatsink is a tower that comes rather close to the window. It looks impressive. Also note that the top optical drive blends in very well with the case (in other words, you cannot even see it!).
This concludes the construction phase.
Completion
The computer is powered on, the OS is being installed, and some final pictures were taken. These try to show the final product.
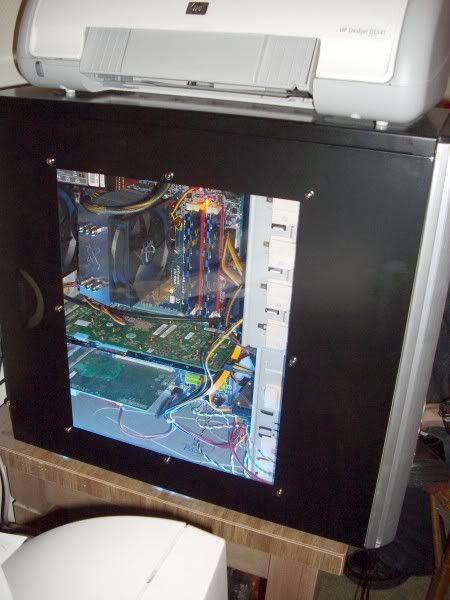
The inside of the case, while having some cables, is certainly an improvement from the past. The camera’s flash obscures any effect from the code cathode in either mode (UV or Blue lighting). The light at the top is a phase check light which only appears for a few seconds after the initial power on phase of the computer as a diagnostic tool.
The cold cathode can be off, on as a UV light, or on as a Blue light.
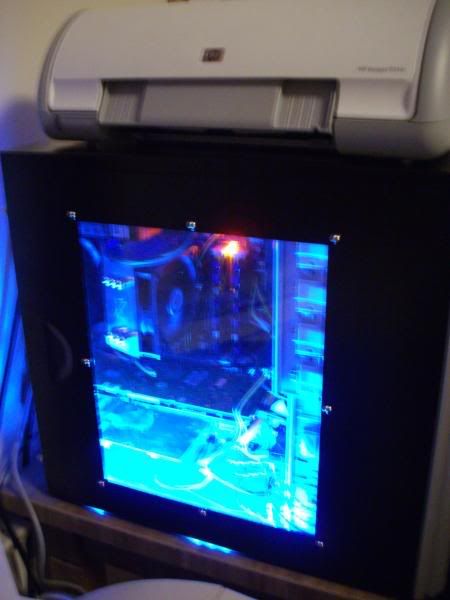
The blue light redefines illumination as quite brilliant. Pretty much, there will be very few times I want this mode on due to the high brightness.
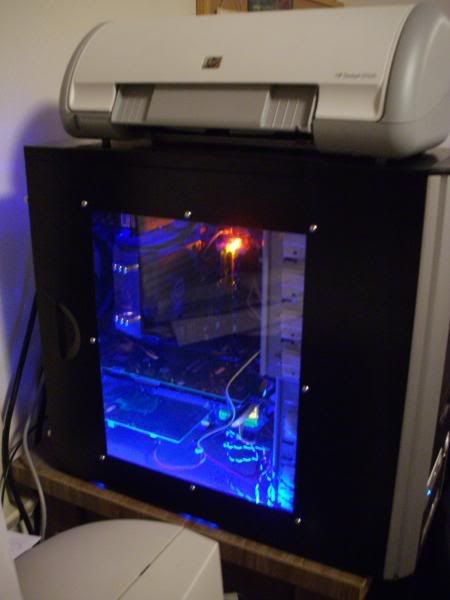
The UV light displays a pleasing purple glow which is much dimmer. This mode is what I use to this day all the time.
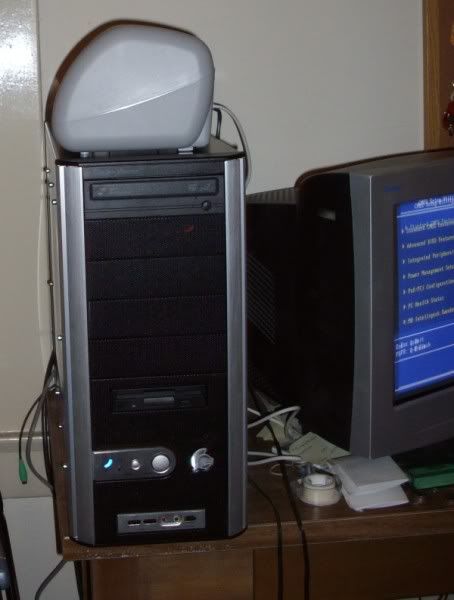
Despite the camera shake, this shows the completed front and a bit of BIOS configuration on the monitor. The system blends into itself very well.

Fast forward to today and this is what my desktop looks like. Vista is installed and works quite well.

I’m running Service Pack 1 and the computer’s name is Black-Thunder thanks to a suggestion from Oglie. My old computer’s name was Lightning-Storm.
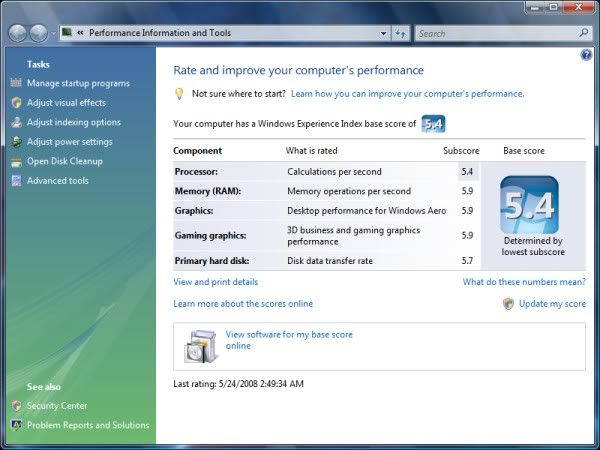
Here is that ever famous Vista performance rating. I can do better on the CPU rating if I overclock which I might do someday. However, I haven’t ran across anything yet that has stressed my computer
Outtakes
Oglie said she wanted an image uploaded even though it was taken accidentally.
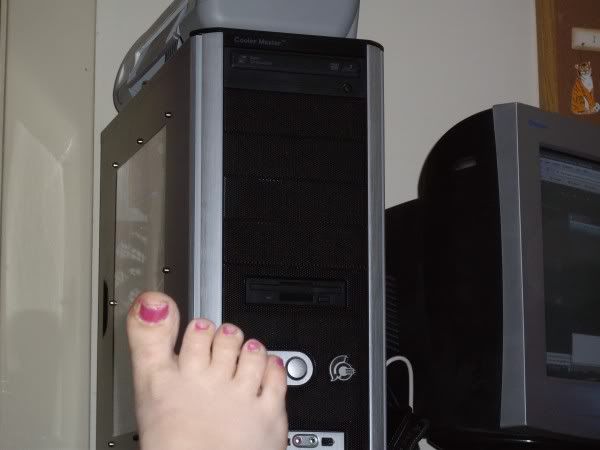
Oglie, being lazy, tried to snap shot the front of my computer case from a sleepy state on the couch. Her feet were on the arm rest and inside of this picture. However, she was quite happy when she saw the results claiming that the photo was useful after all and that she dedicates the photo to Foote!
Oh dear…
Thanks for Reading
As noted before, I thank Oglie2000 for taking the photos, all of CC for reading, and whomever was in CC that one fateful night when I decided to buy the parts (TheDon, Foote, Capt Knight, Oglie… did I miss anybody?).
I survived! Now I have two comptuers… the old and the new… and they both work fine. 🙂
Tonight I was working on a Compaq cmtouper that I’m repairing for one of my parents’ friends. The motherboard was shot from a shipping mishap, so I was replacing the motherboard with a new one. Since nothing was wrong with the cmtouper’s processor, I needed to move the processor from the old board to the new one. I figured this would be an easy job, since I’ve done these kinds of repairs before. Just like Gateway’s tech support issue two weeks ago, I was terribly wrong.